


How to Care for Leather Boots: A Practical Guide

Leather is a material that responds to how it is treated. Well-maintained boots soften, deepen in colour, and develop a patina that reflects the specific life of the person wearing them. Neglected boots dry out, crack, and wear unevenly. The difference between those two outcomes is not complicated. It is a consistent routine and a small number of good products.
This guide covers the full care process for leather boots, from the tools worth owning to the order that makes each step work properly. It is written around the Saphir Médaille d'Or system, which Archive uses and recommends, but the underlying logic applies to any quality leather care product. For a quick reference version, see our Leather Care Guide.
Before you start: what you actually need
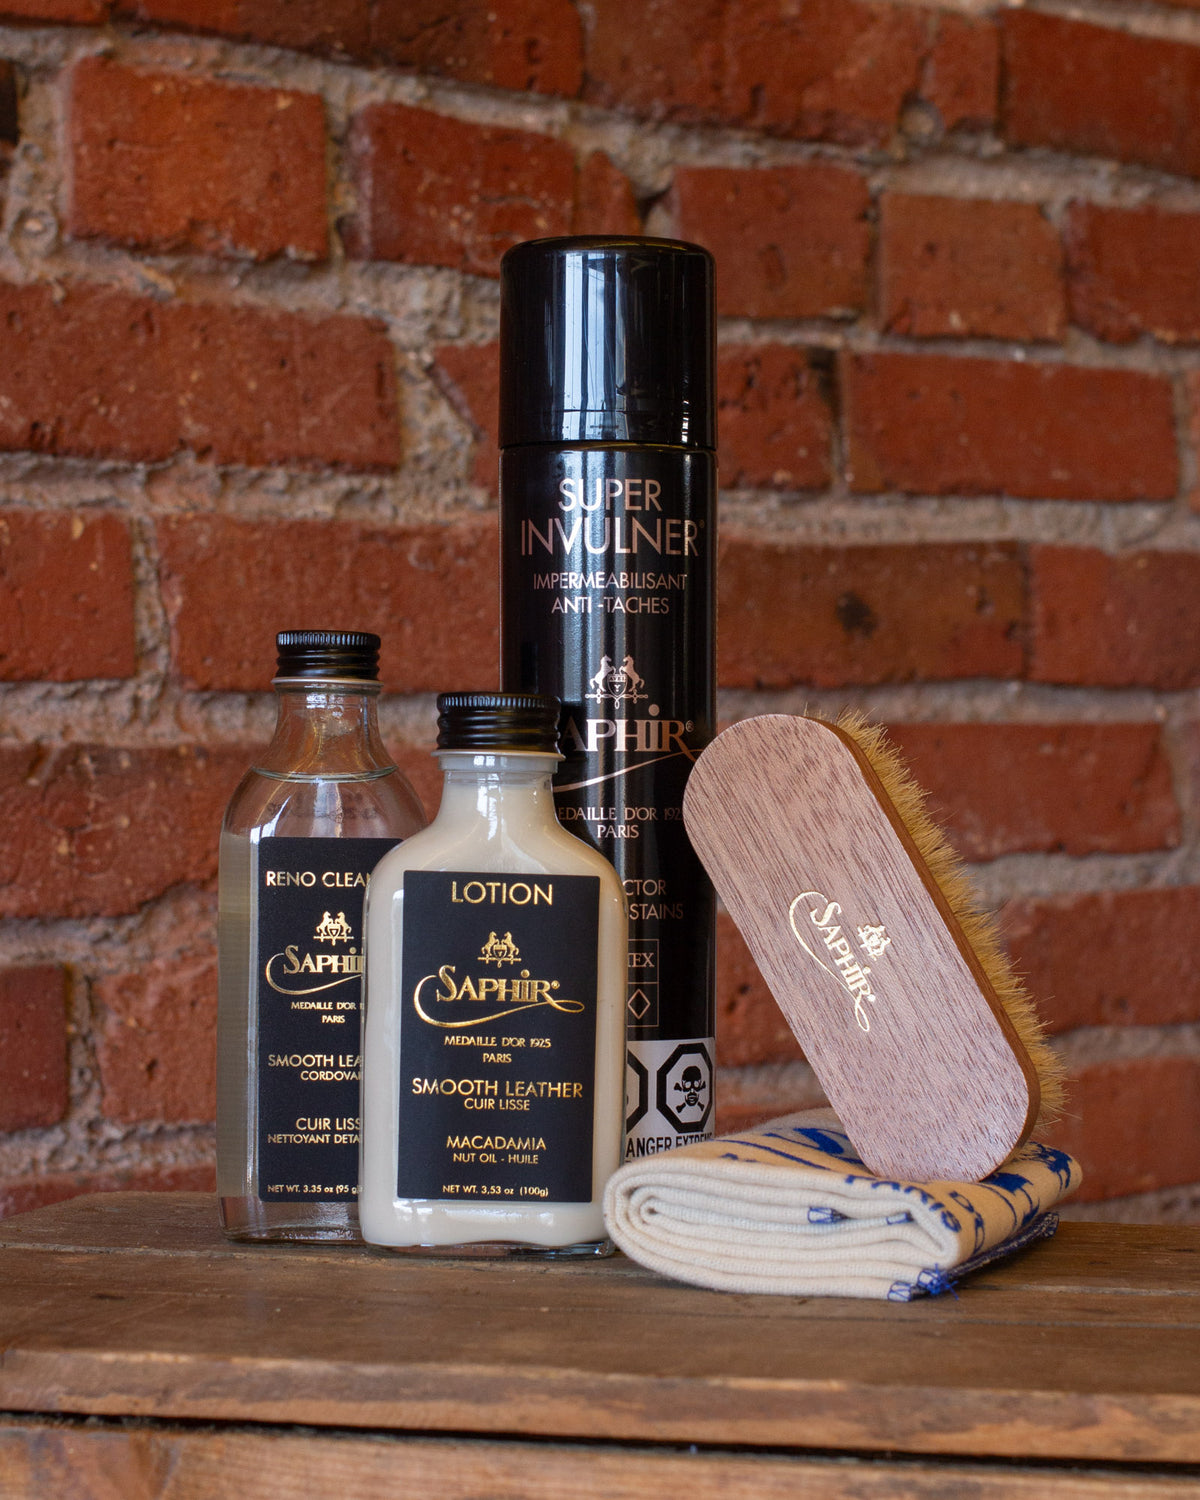
The care routine for leather boots requires four things: a horsehair brush, a leather cleanser, a conditioner, and a waterproofing spray. That is the complete kit. Everything else is optional.
A horsehair brush is the most used tool in the routine. Dense, natural bristles lift surface dust without scratching the grain and buff the leather after conditioning. It is worth buying a good one. A cheap brush sheds and leaves bristles in the wax.
The Archive Leather Care Kit contains all four components in their Saphir formulations, selected for how they work on vegetable-tanned leather. If you are building your own kit, the same products can be sourced individually.
The full care process
The steps below should be run as a complete sequence two to four times a year under normal use, or any time the leather looks dry, dull, or has picked up significant road grime. Day-to-day maintenance is simpler and covered at the end.
01 Prep
Tools: horsehair brush and damp cloth.
Before applying any product, the surface needs to be clear. Use the brush to knock away dried mud and dust, working carefully around the welt and the seams where grit accumulates. Follow with a clean, slightly damp cloth to lift the finer particles the brush leaves behind. Let the boots dry completely before moving on. Applying conditioner to damp leather reduces absorption and can leave marks.
02 Clean
Tools: Saphir Reno Cleanser and a dry cloth.
The cleanser removes old wax buildup and surface oils that have oxidized over time. These residues sit on top of the grain and prevent the conditioner from penetrating properly. Apply a small amount to a clean cloth and work it across the leather in circular motions. Reno is a strong formula — it strips the surface back to the natural state of the hide. Let the boots sit for fifteen minutes after application.
This step is easy to skip and often is. Skipping it means the conditioner in the next step sits on top of old product rather than reaching the leather itself. The boots will look better in the short term and condition less effectively over time.
03 Nourish
Tools: Saphir Leather Lotion and a dry cloth.
Leather loses its natural oils through wear, exposure to water, and the cleaning process itself. When those oils are not replenished, the hide dries out and eventually begins to crack along the areas of highest stress — the toe box, the vamp, and the heel counter. The lotion restores those oils before that process begins.
Apply sparingly with a cloth, working the lotion into the grain with light circular pressure. Let it sit for five to ten minutes to absorb fully. You do not need much. A small amount worked in thoroughly does more than a heavy application wiped off.
04 Finish
Tools: horsehair brush.
Once the lotion has settled, a short buff with the brush removes any excess residue and brings up a natural lustre. Light, brisk strokes across the surface. This is not a polish — it is finishing the conditioning process and preparing the surface for the waterproofing step.
05 Protect
Tools: Saphir Super Invulner.
The final step applies a water-repellent barrier across the surface of the leather. Spray a light, even coat from about twenty centimetres away. Super Invulner is a neutral-base formula that protects against water and salt without affecting the breathability of the leather or altering its colour.
This step matters most going into wet seasons and winter conditions, when road salt is the biggest threat to leather longevity. Salt draws moisture out of the hide and leaves a white residue that degrades the grain if left untreated.
Day-to-day maintenance
The full five-step process is for deep conditioning sessions. Day to day, the routine is simpler.
After every few wears, run the horsehair brush over the boots to lift dust and surface grit. If the boots pick up mud or salt, wipe them down with a damp cloth while the material is still wet and let them dry away from direct heat. Radiators and forced-air vents dry leather too quickly and cause it to stiffen and crack at the stress points.
Cedar shoe trees are worth the investment for boots worn regularly. They absorb moisture from the interior, help the boot hold its shape between wears, and slow the creasing process on the vamp. The Archive Derby Boot benefits from shoe trees particularly during the break-in period.
What care does and does not do
A well-maintained boot develops patina differently than a neglected one. The leather deepens evenly, the creases soften rather than crack, and the surface develops a character that reflects use rather than damage. This is what good leather is supposed to do, and consistent care is what allows it to happen properly.
Care does not prevent patina. It guides it. Conditioning keeps the hide supple so that the marks it picks up over time become part of the character of the boot rather than evidence of deterioration. The scuffs, the toe box creasing, the darkening around the welt — these are not problems to be buffed out. They are the record of how the boot has been worn.
Jules Symons, who leads design and development for Archive, describes a well-worn boot as the best compliment a bootmaker can get. The patina that builds across years of maintained use is the intended outcome of the material and construction choices made at the bench. It does not happen by accident, and it does not happen without care.
A note on vegetable-tanned leather
Most Archive pieces, including the Derby Boot, the Boot Mule and the Chabanel Collection, are made from vegetable-tanned leathers, which respond to care differently than chrome-tanned alternatives. Vegetable tanning uses plant-based tannins in a slower process that produces a denser, firmer hide with a more pronounced pull-up and a stronger response to conditioning.
Vegetable-tanned leather absorbs conditioner more readily, develops patina more visibly, and benefits more from consistent maintenance than chrome-tanned leather does. The Saphir system is well suited to this type of leather. If you are using a different conditioner, look for one that is wax and oil based rather than silicone based. Silicone sits on the surface rather than penetrating the grain and can reduce breathability over time.
When to resole
A welted boot is designed to be resoled. The sole is the consumable part of the construction, and replacing it when it wears through is not a repair so much as routine maintenance on an object built to last decades. Our guide to Goodyear welt construction explains why.
The signal to resole is when the leather midsole begins to show through the outsole, or when the heel stack wears unevenly enough to affect how the boot sits. A good cobbler can replace the outsole without touching the upper or the welt. The boot that comes back will fit better than it did when new, because it has already shaped itself to the foot.
Archive can refer customers to trusted cobblers in Toronto, Vancouver, and Montreal. Reach out directly and we will point you to the right person.

Archive Leather Care Kit
The Archive Leather Care Kit contains everything in this guide. Curated from Saphir Médaille d’Or, it’s a workshop-grade set built to maintain structure, refine patina, and extend the working life of your leather.